Wednesday, October 30, 2013

Finding a Solution That Works for Teaching MATH!

Don't you love it when you find a solution that works for a situation that was otherwise driving you mad?

So do I!

Or rather, I love it when the Lord graciously shows me a better way - usually after I've spent considerable time banging my head against a stone wall, trying a million and one ways that don't work.

This past month, that has happened with math - and I am very grateful for this!

In our current family dynamic, one ongoing challenge that we have is trying to work with two babies underfoot. Despite the use of playpens, blanket time, bouncer time, etc., getting our seat work done has been quite the challenge, especially as they are usually quite cranky by the time we get around to math. And if you've ever tried to teach math to a very distractable 7yo, with two cranky babies in the background, then you know how much of a problem this has been.

In one of my favorite homeschooling books, "A Mom Just Like You," Vickie Farris mentions one family of her acquaintance that gets up super-early and does all of their schoolwork before the babies and toddlers are up. Like Vickie, I thought, "That's nice, but it would never work for me." But it's been on my mind, and as the math situation escalated, I finally broke down and decided to give it a chance - at least partially - with math!

Thus, I've been getting up super-early with the 7yo to do math for two straight weeks now, and it has been an example of sheer awesomeness. This is an answer to prayer, and the way I plan to do this from now on!

With this method, we are completely free to work in a quiet environment, without interruptions or distractions, and it is a complete - and blessed - change from trying to shout over two toddlers while diving out of my seat every other second to pull one or the other out of whatever trouble he's into now.

Additionally, breaking up our seat work into two sessions - instead of one conglomerate lump - has been a huge blessing. Having a huge list of things to work through (math, copywork, handwriting, etc.) is depressing to both the 7yo and myself. Putting math in one time slot and writing in another really lessens the strain on our patience. It's much more doable.

Of course, when the 7yo gets up, he's not ready to dive right in, still being rather sleepy. To solve that, I simply put out one or two books to read to him, and by the time we're done, he's ready to go. More read-aloud time - an added bonus!

I am now in the process of adding our reading lesson to our morning time-slot, and that is also going well.

The one trade-off so far has been the loss of part of my morning "get stuff DONE" time, but it's worth it. And no one ever said that the home education journey was easy! It's a good trade-off.

With this change, we now have our daily lessons in three discreet time slots - early morning time (math and reading), couch time (Bible, catechism, Bible memory, safety skills, calendar, poetry, picture study), and late-morning seat work (handwriting, copywork, weekly map skills).

(There is also our afternoon read-aloud time, which covers science, history, and literature - but that is so much fun that it doesn't even feel like school! But I guess that you could say that our school day is divided into four parts if you want to count afternoon session.)

And there you have it. Another school problem solved - and I'm so grateful for the Lord's help in remedying what was otherwise a sticky and very troublesome issue in our home education journey.

Has anyone else tried the early-morning solution? Let me know how you like it! 

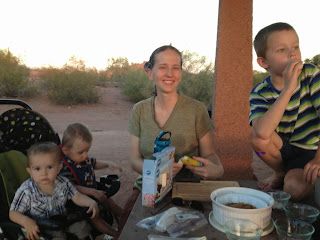
The 7yo and the 1yo together. The 1yo is cute, but there's no doubt that we get more done when he's SLEEPING!


Tuesday, October 29, 2013

Learning to Rejoice Over Spilled Milk!

This past week, we decided to head out to our local botanical gardens for their monthly free day, and we decided to combine that outing with our second annual Caramel Apple Party.

Sounds fun, no?

But this trip turned into more than just a double-outing - it turned into an object lesson on the value of rejoicing over "spilled milk" - over circumstances gone wrong.

It all started when we got to the botanical gardens. While waiting in line for our free passes, we noticed that people were... paying. Paying during free hours?? Yup. Without our knowing it, they had changed the free hours from 1:00-8:00 p.m. to 8:00 a.m. - 4:00 p.m. We arrived about 45 minutes after the free time ended.

What a bummer! We had really looked forward to seeing the botanical gardens during what is probably the nicest month of the year, weather-wise. We were really disappointed.

But in trying to find something else to do, we decided to go to a nearby park that we hadn't visited since before we had children - and in doing so, re-discovered one of our city's treasures. Though we had neglected this urban park, it was delightful, and we had a great time - especially DH and our eldest, who did the hike to the top of "Hole in the Rock" Mountain.

"Hole in the Rock" Mountain

The 7yo at the top!

Had the botanical gardens not been unexpectedly closed to us, we never would have re-discovered this awesome park. Score!

The view from the top! (You can see Yours Truly with the babies at the bottom near the picnic tables.)
After seeing the park and climbing the mountain, we headed to a park bench for our Caramel Apple Party. I unpacked the sprinkles, the caramel dip, the marshmallows, but... the apples? Crumbs. I'd left them at home. We had all of the toppings, and none of the apples.

Bummer again!!

Thankfully, though, I had brought a couple of bananas for our baby who can't handle apple-texture yet - and our Caramel Apple Party thus was instantly transformed into a Caramel Banana Party! Though it was a wee bit different, it was every bit as fun.

Score again!


None of these circumstances was life-changing or tragic. They were just minor inconveniences. But all of us are quite capable of letting small inconveniences translate into bad moods, snippy words, and a ruined afternoon full of lost tempers and irritation. This time, however, we let our circumstances transform our afternoon into something quite different but just as fun.

If only we could do that every time - we're working on it!

Have a wonderful night, everyone!


Monday, October 28, 2013

A Cure for Extreme Morning Sickness, Coming to a Blog Near You!

That sounds a bit far-fetched, doesn't it?

But, as a matter of fact, I'm not joking.

More details will be published soon, and in the meantime you can read the initial summary here. I can testify that yes, this is for real. This mama is a repeat-HG (six-time) mother, and she is just finishing up her first trimester... with no HG. I'm anxious for all of the details to be published (*hint*hint*hint*), but I wanted to link to the teaser so you can all be waiting on tiptoes!

Have a great night, everyone!

I've Found a Homeschool Schedule! {*Wild Celebration Ensues*}

For the first several years of our home education journey, I have not had a set yearly schedule - i.e. a pre-set schedule of start dates, end dates, and vacation times. I simply did what many people have told me that they do - go until you want a break, and then take a break.

Thus, we simply "did school" until I was so burned out that I couldn't take it any more, and then I'd throw up my hands and declare a holiday. It worked. Sort of.

But there were many disadvantages to this system.

Firstly, I am an organized-type of person. I like having a plan and knowing where I am. And with this random type of schedule, not only was there no plan (which always makes me uneasy), but I have had no idea of whether or not we're ahead, on schedule, or behind with our books.

Additionally, and perhaps more importantly, not having a schedule has robbed me of many joys - the joy of anticipating a vacation, the joy of having a vacation time that is well-planned (with crafts, activities, outings, etc.), the joy of celebrating the beginning of a vacation. Instead of coming to a Friday and being able to celebrate the beginning of a break, for example, with perhaps a special dinner and dessert and an outing, it's been mainly a matter of waking up on a Monday morning (with school previously planned) and realizing that I am too tired and worn-down to continue. Thus, we end up with vacations that are half-wasted and completely unprepared-for.

I needed a schedule!

As we go through our school years, I am realizing that a "Sabbath schedule" seems to fit our needs. This is basically a six-weeks-on, one-week-off type of schedule - it seems to be what comes naturally.

Last week, therefore, I sat down with my Outlook calendar and started marking down weeks on and weeks off to see what I ended up with, and I actually came up with what seems to be a wonderful schedule based on the Sabbath schedule model. It consists of six six-week terms, with a one week break in between each - except for summer break, which is six weeks, and Christmas break, which is four weeks.

Additionally, because I prefer to take our break-times during our more temperate Phoenix fall-winter time, our "summer" is in March/April rather than actual summer (when it's too hot to do anything outside around here!).

There is some additional tweaking I'd like to do - our summer break is still too late in the year for my liking, and I'd like to move some of our off-time to October (our most beautiful month!). Additionally, I'll have to give this schedule a whirl for a year or two before I'll know if it truly works.

But for now, here's what I've worked out!

Two additional benefits of having a schedule are (1) knowing my approaching deadlines, such as when I need to have year summaries written and lesson plans completed, and curriculum ordered, and (2) knowing how well we are keeping up with where we need to be in our books. For example, in figuring out (based on the schedule below) that we are now two weeks into our fourth term of the year, I find that we're just a wee bit behind - nothing to worry about, and nothing that we can't quickly make up. That was quite reassuring, and much to be preferred to the "I have no idea where we're supposed to be, and I sure hope we can finish before the end of the year" way of doing things!

Hopefully this chart is fairly clear - I have given the approximate dates of each term, then the length and timing of each subsequent break. For example, the first line shows that our "First Term" of the year is a six-week term occurring during May/June, ending in a one-week "Summer 1" break that will be in June.

Going by this calendar, our first day of school for the 2014-2015 school year will be May 19th, 2014. I may try to move that up a bit, so we'll see how it goes!!

 Term
 Term Dates, approx.
 Term Length
 Vacation/Break
 Approx. Date
First
May-June
6 weeks
Summer 1 (1 wk)
June
Second 
Jul-Aug
6 weeks
Summer 2 (1 wk)
August
Third 
Sept-Oct
6 weeks
Fall (1 wk)
October
Fourth
Oct-Dec
7-8 weeks
Christmas (4 wks)
December
Fifth
Jan-Feb
6 weeks
Winter (1 wk)
February
Sixth
Feb-March
6 weeks
SUMMER (6 wks)
April - May

Homeschooling friends, I'd love to hear about your schedules! What have you worked out for your family? What works, what doesn't?

Sunday, October 27, 2013

Cooking Through ENGLAND: Stottie Cake!

(Note: This article was written some time ago, which is why it may seem a bit out of order.)

As part of our unit study on ENGLAND, we have been cooking a ton of British food! Oh, goodness - it is so fun!

I know that England has a reputation for dull food, but I don't mind a bit - I love British food! In fact, I haven't tried anything yet that I haven't absolutely loved.

And so, to share our adventures with you, I thought I would provide brief write-ups - and pictures! - of some of our culinary adventures.

One of our first cooking adventures was Stottie Cake. Like many British foods, this has a confusing name - it's not a "cake" as Americans think "cake" - rather, it's a moist, heavy, unsweetened bread. The name comes from "stott", which means "to bounce" - which it is assumed that the bread would do if dropped! (It has a very heavy texture.) We absolutely loved it!

Stottie Cake is from the north of England, and it's often served stuffed with either Pease Porridge or bacon and eggs. We decided instead to be uncivilized rebels and serve it with butter and jam instead, and it was awesome.

(See more history on Stottie Cake here. I'm too lazy and tired to summarize it right now, so you'll have to go read it for yourself.)

We used this recipe, and it turned out very well. Note the following: (1) There is one error in this recipe - it never mentions what to do with the milk. Add it with the yeast/water. (2) You can let it rest a bit after shaping, before baking. (3) A half-recipe makes one large flattie. A full recipe will make two large flatties. If you want smaller flatties, it will, of course, make more!

Before baking, pricked with a fork and with the traditional hole in the middle:


After baking (it smelled delicious!):


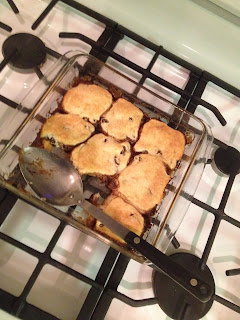
Smothered with butter and jam. YUM.


For a slightly different recipe and a delightful video, see the following:

]

Enjoy, everyone!!!

Friday, October 25, 2013

Cooking Through ENGLAND - Hasty Pudding!

In our current culinary adventure, "Cooking Through England," one of this week's projects was Hasty Pudding!

This, truly, was something I'd never had before. I didn't even know what it was!

But no matter. I quickly found a promising-looking recipe, and we gave it a whirl. I wasn't expecting anything amazing, so it was to my complete amazement that this dessert was a huge hit in our household, rocketing to the #2 spot in our family recipe rating system, garnering a 4.5 out of 5 score! (I believe that Stottie Cake is still holding the #1 position in our tour of English recipes, with a score of 4.6 - close!)


For the above recipe, I consulted the comments and made the following changes:
  • I reduced the water and brown sugar to 1/3 cup each, and added 1/2 tsp. cinnamon to the sauce.
  • We omitted the nuts (family preference only).
  • I increased the flour to 1 cup.
As I said, it was a hit!


But then things got a bit confusing. Firstly, I noticed - after the fact - that this recipe reads, "It's an old German recipe my family has made for many holidays." 

German recipe? Oops.

And when I consulted our trusty Wikipedia on the subject of hasty pudding, I read:
"Hasty pudding is a pudding or porridge of grains cooked in milk or water."
Okay, that was definitely not what we made - the dish we made is basically sweetened biscuits in a sugar sauce.

(And, as a side note, I have no idea why someone posted a picture of chocolate pudding to go with this recipe. It has nothing to do with chocolate pudding!)

Upon reading further, I found that hasty pudding is a dish of many faces - it has many different meanings, and is present under many guises in many different countries. In American cooking, for example, it is a dish of cornmeal porridge. And:
"Polenta is the Italian version of hasty pudding, with corn substituted for the wheat originally used by the Romans. Mămăligă is the Romanian version, also made with corn."
Thus, one could spend quite a bit of time just making different ethnic versions of hasty pudding!

In the meantime, the version that we tried was excellent, and it was highly enjoyed by the entire family - everyone had seconds!

Enjoy!  

Thursday, October 24, 2013

Hey, You! Wanna Play CHICKEN? (Zaycon Foods)

{Post contains a referral link - if you click on the link below, please use "ZF190988" as the referral name so that I can earn a dollar for referrals!}

Ladies and gentlemen, I want to put out a quick promotion for Zaycon Foods, purveyors of fine meat products (as well as milk, honey, and various fruits). We just picked up our second order of Zaycon boneless, skinless chicken breast, and again, their quality is excellent - as is the price! After our super-quick pick-up process (it's a literal drive-through meat pick-up!), we take home our chicken, spend an hour popping it into freezer bags, and voila! Chicken for the freezer!

Forty pounds of chicken! 

Chicken is sold in 40-lb. boxes, and the chicken event is held twice annually. I'd like to pick up two boxes (one wasn't quite enough for a whole half-year), but for now we're sticking with one - and the quality is awesome.

Zaycon has tons of awesome products and locations in almost every state.

If you don't know Zaycon Foods yet, definitely check them out!


First Term Science Experiments! (A Big Success!)

Each home educating family has its strengths and its weaknesses. My weaknesses include a sincere dislike of anything that produces mess. I simply detest messy projects (and cleaning them up). And though my dreams of a NASA-cleanroom type house don't seem to be coming true, I do like to maintain a certain level of orderliness and cleanliness (the levels of which seem to be declining each year).

This means that things like crafts, science activities, and big projects of any kind are naturally on my, "Oh, man! Do we have to?" list. In other words, my instinct is to avoid them like the plague.

However, there's another and greater truth - and that is that I have been entrusted with the education and raising of my children. Home education was not something I volunteered for - it was something that I felt was specifically assigned to me by the Lord. And that being the case, I want - very badly - to do a good job at the assignment that has been entrusted to me.

Additionally, I don't want my children to grow up into some of those rare-but-unfortunate former homeschoolers who were dissatisfied with the homeschool experience. (I've only seen a couple of these, thankfully!) I don't want my children missing out on the fun parts of education - the fun parts being all of the things that I would naturally like to avoid.

That being said, bring on the crafts and science activities!

I have assigned myself the job of providing a minimum of one craft, one science activity, and one field trip per week. The field trips are easy - it's more of a job of keeping them down to one per week - and I've found that there are oodles and oodles and oodles of awesome crafts and science activities to be found on the internet (and I'm collecting them in Evernote notes - more about Evernote later!).

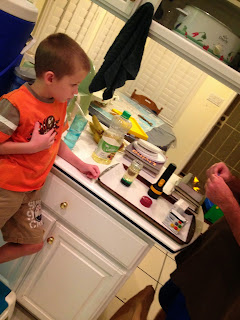
For the first half of this year, science activities have been a huge success. My current system is to do the research, print off the directions, gather the equipment and supplies, and then let DH and our eldest son loose with them. This allows DH to be involved in our lessons, and they have a great time together.

And - as always happens when I force myself to do something that stretches my comfort zones - I have found that I, too, am having a wonderful time with science experiments! They are definitely a high point of our week.

We do occasionally have to buy one or two ingredients for the activities, but on the whole, science activities for lower level elementary have been surprisingly easy and inexpensive to do. If you haven't yet launched out into this area, I highly recommend it!

Here are some of the science experiments we've tried this year (for first grade):

Milk and soap - polarity. 
Painting with Vinegar - one of many vinegar/soda experiments!

Bubbling lava lamps!

Cornstarch Polymers
If you haven't yet delved into the area of science activities for young children, it might be time to give it a try! Enjoy!

(Try Steve Spangler Science for some starter ideas!)

***

Housekeeping Note:

I generally try to blog only twice weekly, but I am currently overrun with half-finished blog posts - so I am publishing more often for a little bit in order to clear up older posts and enable me to start some new ones! Thanks for your patience! 

Wednesday, October 23, 2013

Cooking Through ENGLAND - Baked Apples!

This cooking "project" was sheerly accidental! I happened to be making baked apples and realized that baked apples were, indeed, British! And voila, another British cooking project was born!

Who, indeed, could forget Mr. Woodhouse's strictures on baked apples?
"And when I brought out the baked apples from the closet, and hoped our friends would be so very obliging as to take some, 'Oh!' said he, directly, 'there is nothing in the way of fruit half so good, and these are the finest looking home-baked apples I ever saw in my life.' That, you know, was so very -- And I am sure, by his manner, it was no compliment. Indeed they are very delightful apples, and Mrs. Wallis does them full justice -- only we do not have them baked more than twice, and Mr. Woodhouse made us promise to have them done three times -- but Miss Woodhouse will be so good as not to mention it.
              - Miss Bates in Jane Austen's Emma (emphasis added)
Such a delightful quote! And did you know that - in older times in Europe - raw fruit was actually considered unwholesome? True story! Fruit was almost always served cooked, with few exceptions. Thus, baked apples would have been more common fare than raw apples.
"But about the middle of the day she gets hungry, and there is nothing she likes so well as these baked apples, and they are extremely wholesome, for I took the opportunity the other day of asking Mr. Perry; I happened to meet him in the street. Not that I had any doubt before -- I have so often heard Mr. Woodhouse recommend a baked apple. I believe it is the only way that Mr. Woodhouse thinks the fruit thoroughly wholesome." 
                         - Ibid. (emphasis added)

Not that I'm complaining - we love baked apples!

We used this recipe for Crockpot Baked Apples from Christy Jordan's Southern Plate, and they were great! They cooked all afternoon and smelled heavenly. The whole family enjoyed them, and I mashed up the leftovers to use to make apple-cinnamon oatmeal.

Definitely a keeper!


Another wonderful thing about baked apples - they're very forgiving. Mix up the basic ingredients, and you're pretty much guaranteed success - they're hard to mess up. 

Yes, that IS the banner from hubby's birthday three weeks ago. I may or may not have trouble with remembering to put things away when we're done with them. 

Hard to see, but delicious!

Tuesday, October 22, 2013

How to Re-Purpose a Broken Beverage Dispenser!

What do you get when you add the neighborhood's biggest light-saber collection...


With an irreparably broken lemonade dispenser?


You get, of course, an awesome light-saber holder!


Now I'm just waiting for the next one to break so that I can re-purpose it too!!

Monday, October 21, 2013

Cooking Through ENGLAND: Spotted Dick and Custard!

And we continue our culinary tour through England, part of our unit study on England. My goodness, England has awesome food - I don't know when we'll be done sampling their cuisine! (Probably never!) We're having a wonderful time rating recipes and trying new dishes, and we have not yet had a flop.

At first I thought that this dish, Spotted Dick and Custard, was going to be our first flop, but it turned out great in the end. I should have known that England wouldn't let me down!

The modern alternative name to this dish is "Pimply Richard." I prefer "Spotted Dick." At least we ignorant Americans don't know that the British "spot" is the American "pimple," so "Spotted Dick and Custard" at least retains some air of European elegance!

Read more about the history of this dish here.

I used this recipe for the Spotted Dick over at "Plus 2.4: Preserving a Slice of British Life." An added bonus - this is a version for the crockpot, always a plus for deprived Americans who don't have the proper apparatus to make real steamed puddings!

(For those unaware of the fact, a British steamed pudding is not an American pudding, that is, a milk-based dish thickened with eggs or starch. Rather, it is basically a sweetened bread that is cooked, covered, in a water bath. "Pudding" can also simply mean "dessert.")

Here are the proportions from the recipe above, re-written:


225g self-raising flour = 2 cups flour + 1 Tbsp. baking powder + 1 tsp. salt
1/2 tsp. salt
100g (3 1/2 oz) shredded suet
100g (3 1/2 oz) currants or raisins
150 mL (5 oz) water


Not having currants, I used raisins.

And now, of course, we come to the key word - SUET.

Does anyone here know what suet is? To my surprise, many people on my facebook page had never even heard of it. And while I had never actually seen suet, I did know what it was - or thought I did - beef fat! However, I found, upon research, that been suet is not just beef fat, but beef cavity fat - that is, the fat surrounding the internal organs (rather than that which is trimmed from meat). It has different properties (primarily a higher melting point) and must be bought specifically.

And thus began my researches!

At Whole Foods, they thought that suet was plain beef fat, and offered to set aside some trimmings for me. At our local meat shop, they knew what suet was, but didn't carry it or know anyone who did. Finally, at the advice of a friend, I tried The Meat Shop in Phoenix, a wonderful place with an all-knowing and ever-sapient staff who know all about suet (and everything else meat-related under the sun!).

Since we were going to be in the area, we arranged to pick up a couple of pounds of suet from them, which we did. We brought it home, and a few days later I popped it out of the freezer to make our pudding.

That's when things really turned difficult.

I had pictured suet as a neatly packaged pre-rendered product, something like commercially prepared lard - nice and clean and ready to use. NOPE. This stuff was the real stuff - just as it had been cut off of the cow. Thus, it had membranes, gristle, and... pink areas. Pink areas as in blood.

Oh, goodness. 

In all its glory! 
Now don't get me wrong. I'm a homemaker, for crying out loud, and I deal with beef blood almost daily. It's just one-of-those-things you get used to. But putting it in a dessert? That was enough to make me a bit on the queasy side. I'm dealing with beef fat... and membranes... and blood... and I'm putting it in something that we're going to pour custard sauce over and call dessert!

Yikes.

And it gets worse, because the suet had to be grated. I didn't think that this would be too difficult - kind of like grating cheese - but it was much more difficult. The membranes got stuck in the grater, it required a lot of force to grate, and I had to keep turning aside to tell myself that I wasn't really going to be putting this pink-tinged beef fat into our dessert. Ah, the beauties of ethnic cooking.

In the end, it required the full effort of both my husband and myself in order to grind the requisite amount of suet. Don't underestimate this stuff! It really took some work!

After that, putting the pudding together was a breeze, as was cooking it. Here it is, in all its glory!

Still in its mold


Unmolded
Now for the custard sauce.

Unfortunately, the above recipe didn't have a custard sauce, so we turned to this recipe for custard. Not having either double cream or caster sugar (love these British ingredients!) I used regular American whipping cream and granulated sugar.


 Unfortunately for all of us, I forgot that I was not making a starch-thickened custard (like chocolate pudding, etc.), and so instead of cooking "on low heat, just until thickened," I merrily brought it to a hard boil over high heat - with the result being that my poor pudding sauce looked in the end like a sweetened scrambled egg dish. The taste was fine, but the texture was.... well, scrambled.


The verdict?

It was great! Seriously! Blood and all. It tasted like raisin bread (and you couldn't taste any beef flavor at all). The sauce was too sweet for my taste, but having been on a zero-carb diet has given me a heightened sense of sweetness, and I'm no fit judge - DH thought it was fine.

One caveat is that the dessert must be served warm, because the texture reverts to something like a brick when it is cool.

Would I make this again? Sure! It was great! And it was a lot of fun. But I might just buy vegetable suet (assuming that I could even get it here in the States) simply to save trouble. Normally we avoid vegetable shortening, but here it might be worth it - unless I could ever discover a source for pre-shredded (or at least pre-rendered) beef suet.

More modern versions of Spotted Dick may call for more spices, which would be an interesting variant!

If you'd like to try an easier British steamed pudding, the Date Bread in Mabel Hoffman's Crockery Cookery is easy, fast, and uber-delicious (and doesn't contain suet!). I have made it every year for the past half-decade (without knowing it was a "pudding") and the whole family loves it.

And there you have it! Spotted Dick and Custard. Enjoy! 

Friday, October 18, 2013

How to Make Homemade Strawberry Milk! (Dye-Free!)

A few months ago, someone gave our son strawberry milk - and he's been asking (begging) for it ever since. It was a huge hit with him.

However, strawberry milk made from commercial syrups is really, really scary - extra scary in that it contains massive amounts of Red 40 food dye (among other really scary ingredients, none of which has the least relationship to an actual STRAWBERRY).

High fructose corn syrup, water, sugar, corn syrup, artificial flavors, citric acid, sodium benzoate, xantham gum, Red 40. 

Now, food additives are always problematic, but there's something special about Red 40 food dye, namely that it is....

SHEER EVIL

Some of you mamas out there know what I'm talking about, don't you? We discovered quickly - when the above-mentioned child was a toddler - that handing said toddler a food item containing Red 40 was something akin to inviting demonic possession. It turned a "challenging" child into an "oh my goodness, this child has been transformed into a MONSTER" child. We saw it too often to be mistaken, and two of the parenting days that still make me shiver when I remember them were days following massive intakes of Red 40 dye.

Now that our son is older, food dyes do not seem to produce quite the same SHEER EVIL effect. This would be expected, since toddlers are more sensitive to dietary and lifestyle factors - like diet, sleep, schedule, etc. - than are older children and adults. Though we try to maintain healthy food and jettison prepared foods that are rife with food dyes (among other additives), I don't maintain my "NO RED 40" rule that I kept in those toddler days (for a while, I listed it as an allergy when we dropped him off any place).

However, I still am not crazy about voluntarily handing our son a drink that is basically a syrup of SHEER EVIL. And so, the search for all-natural strawberry milk began!

Actually, it was pretty easy to find. I used this recipe from "The Kitchn", and it was super-easy! (See the link for delightful pictures and a recipe printable!)

Mix the strawberries (1 cup) and sugar (1/2 cup) and water (1 cup) in a pan:


Boil gently 10 minutes:


Strain. Save the strawberries for something else - I mixed them into yogurt, and it made awesome baby food for the little ones!


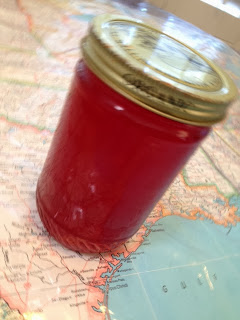
The leftover is your syrup!


For one serving, mix about 3/4 cup milk and 3 Tbsp. syrup - or thereabouts, use more or less.


Et voila!


Now, if you have leftover syrup (which I did), you can save it for a while in the fridge (not sure how long it will last) - and then make any leftovers into pancake syrup! Yum!

For each batch, add approximately

2 tsp. cornstarch, mixed with a small amount of cold water

Bring syrup to a boil, add cornstarch mixture, and boil for 1 minute. Serve with pancakes! (Amount of cornstarch added will depend on personal preference for syrup thickness.)


As a postscript, someone mentioned that an even easier way to make strawberry milk is to stick milk and fresh strawberries into a blender and give it a quick whirl - no sugar or cooking needed.

Why didn't I think of that?

(You could probably also use strawberry jam and milk to blend into strawberry milk. Again, the obviousness of this is smacking me in the face!)

But the above is pretty good! (And so is the pancake syrup!)

Enjoy, everyone!


Wednesday, October 16, 2013

Cooking Through ENGLAND: Derbyshire Oatcakes!

This was one of our first "Cooking Through England" adventures, part of our unit study on England, and they were a huge hit! And not only that, but extremely simple and fast to make! Definitely put these on your list of recipes to try!

***

The Recipe:


DERBYSHIRE OATCAKES

Mix:

1 cup regular oatmeal
1 cup flour
1 pinch salt

Add and mix to make a thin batter:

1/2 to 1 cup water (we used the larger amount)

Just before cooking mix in:

1 tbsp. baking powder

Cook as for pancakes on a hot greased griddle until golden brown on both sides. Serve with bacon and eggs or with lemon juice and sugar (or as we did, with maple syrup). Leftovers can be toasted with cheese.


***

These were a huge hit with our family, and have found a place in our regular recipe rotation. But we should have known! If it's from Derbyshire, it has to be good!

Enjoy!

These were a hit with the entire family! 

Thursday, October 10, 2013

Country Unit Studies: Making a "We Say, They Say" Chart

We're currently in our first unit study of a country - to wit, England! - and one very fun thing that we are doing is keeping a "We Say, They Say" chart. It's exactly what it sounds like - a basic chart that keeps a side-by-side list of American words and phrases with their equivalent in the language of the country under study.

For a study of a non-English-speaking country, this would be word translations and phrase equivalents. For England, of course, it is American English v. British English. Some of these may be archaic rather than modern, but one way or the other, it's a lot of fun!

Here is our current "We Say, They Say" list for England!

[Page 1]

[Page 2*]

* Just a note that there is one error in this chart - "swat" should be spelled "swot." My mistake! 

We also enjoyed these two videos - the first deals specifically with British v. American words and phrases, and the second deals with a couple of pronunciation variants:


We had fun watching these videos and adding the words and phrases to our "We Say, They Say" list!

I should say, as a side note, that reading British literature as a child and young adult is a wonderful way to learn these terms naturally. Being that I was raised with a constant flow of British literature, I learned much British vocabulary quite naturally as a young person, and as a result, none of these terms has been new to me - I already knew them! It's a great help to know British American words and phrases, and it avoids a lot of puzzlement when dealing with British literature and online articles. I highly recommend the organic absorption of vocabulary through literature as well as this method - making a list has been fun, but reading gives more lasting knowledge.

We plan to do this with future country studies as well, and it's a lot of fun! Enjoy!

* * * * *

"There even are places where English completely disappears; 
in America they haven't used it for years."

- Professor Henry Higgins, "My Fair Lady"

Tuesday, October 8, 2013

Country Unit Studies: How to Create a Food-Rating Chart!

As part of our country unit studies, another fun thing that we are doing is a "Food Rating Chart" - a way for us to evaluate the ethnic dishes we're cooking and compare our thoughts on how they came out!

This is fun, simple, and super-easy to do, and I encourage you to try it for your country studies!

When we first tried it, I insisted on a consensus rating - everyone coming to an agreement - but that, frankly, was a disaster - we spent all of our time arguing. Now we allow each voting family member to give his own rating, and we average the values together.

Our values are:

1 = horrid
2 = not good
3 = decent
4 = very good
5 = the best

For our current study of ENGLAND, the current front-runner is Cornish Pasty (tried after the following picture was taken), followed close behind by Stottie Cake.

We all have a lot of fun with this (the 7yo runs for the rating sheet whenever we sit down to try another British dish), and it's a lot of fun seeing where the averaging process places each food in the rankings.

Here is our somewhat current listing of British foods that we have tried:


Keeping this record has been a great way to review and learn about ethnic foods and to encourage conversation and friendly debate among family members.

If you're looking for something fun to do with ethnic food during your country unit studies... give it a try!

Monday, October 7, 2013

Fall Break - Time for Lesson Planning to Begin!

This week is our homeschool's Fall Break! We're thrilled - we were really ready for a break.

(Right now I do not have a defined, planned-ahead schedule. We just take breaks when we feel ready for them! I want to get better about this in the future, and it looks like we may adopt the "Sabbath schedule" - that is, six weeks on and one week off. We're usually ready for a break by then!)

During this week, I have approximately a half-million things that I would like to accomplish - for school, for home, and otherwise. Here they are!

  • Work on better (earlier) bedtimes and better (earlier) waketimes for the children
  • Create chore charts for morning jobs
  • Start a list of future science experiments/activities so that I can gather equipment and materials proactively
  • Ditto with a craft list 
    • Make individual craft lists by holiday
  • Start doing my 15 minutes per day of organizing/deep-cleaning before the family gets up
  • Change our math schedule to early mornings (our current late-morning time with a toddler underfoot is not working)
  • Assign a weekly day for each of the following
    • Project Night
    • Craft Day
    • Science Experiment Day
    • Library
  • Set date for our annual Caramel Apple Party
  • Make Pam W's famous pumpkin dip
  • Improve chore inspection practices
  • Set day of the week for each child to be a meal helper
  • Plan Christmas
    • How to host a large group on a really tight budget
    • Make holiday planner calendar for Nov-Dec-Jan
    • Make gift-request list to give to relatives
  • Write Christmas letter
  • Get the 20-month-old to start sleeping on his own
  • Clear out the garden
  • Plant the garden
  • Arrange for carpet cleaning (this has only been on my to-do list for three years now)
  • Make my Azure Standard October order
  • Celebrate hubbie's birthday
  • File old lessons and lesson plans, plan for the coming week
  • Set a Daddy-Son Camping Night date
  • Make an apple pie!
As I learned last summer, I don't get a lot done during "breaks" - we may be off from school, but the round-the-clock physical work of caring for a home and three small children simply does not leave much leisure. In all honesty, I will be very pleased if I get half of the above list done. 

However, this time around I did remember to plan activities for our break (unlike last summer). Here are some of the fun things we're going to do this week:
  • Arizona Museum of Natural History (free day!)
  • Desert Botanical Gardens (free day!)
  • Celebrate Daddy's birthday - peanut butter pancakes, peanut butter pie, peanut butter candy. (Sense a theme here?) 
  • Park Day with one of our homeschool fellowship groups
  • Vinegar Painting
  • Glitter Jars
  • (Finally getting around to) painting our map of the British Isles
What do you all have planned for your Fall Break? 

One of our last outside water-evenings of the year! 

Saturday, October 5, 2013

In Which Peanut Butter Saves the World (Again)!

Last week I posted about the awesomeness of peanut butter in preventing and treating toddler food-tantrums, and this week, peanut butter is again saving the world - as the most effective adhesive remover in the world! For those glass or plastic bottles that are covered in an adhesive that seems stuck with all the power of the universe, give it a try!

Before this, I used a commercial preparation that simply did not work. I don't know how the company even stays in business. I tried multiple applications, long applications, you name it - it never removed one bit of label adhesive.

But peanut butter is another story, and in two or so months of use, I have never seen it defeated!

Simply smear on, wait a while (I usually give it a few hours, because I walk away and forget about it), and then scrub off with hot water and dish soap. For an extra boost, fill the bottle with hot water to help melt the adhesive.

And.... voila!


Being that I am really getting into preparing and storing my own foods, this discovery has been a Godsend! (No, I'm not canning in them - just storing dry goods and using them for lacto-fermented food products such as salsa - plus using the plastic jars for toy containers!)

Enjoy!

Tuesday, October 1, 2013

Keeping Tantrum-Treatment in the Diaper Bag!

This past week, we went on a group field trip to a local museum. We had a great time - but one of the mamas who came on the trip did not. In fact, she was pretty miserable - because her wee one spent the entire two hour trip in one very long tantrum. Of course, the little one did come up for air occasionally, but she went right back into it as soon as she caught her breath.

I felt so badly for that poor mama.

I have no idea what caused that little one's problem that morning. And toddler tantrums are something that I am still learning to cope with - there are so many different kinds and causes.

But one thing that I've learned (the hard way) is that at a certain age - early toddlerhood - hunger will cause absolutely the worst tantrums. With our first-born, I would be ready to pound my head into the wall with frustration at this type of tantrum (the manic kind that results in repeat misbehavior and hyperactivity) - until I finally learned that I had to bodily tie the toddler into his high chair and set massive amounts of food (especially fats and proteins) in front of him. He would eat like a raving maniac, and then be fine.

Our current toddler has had several of these types of tantrums, but now - with a little experience - they're a lot easier to recognize. And since I'm working really hard on providing regular meals and snacks (that always have protein and fat in them), they occur far less often than before.

I have since heard this in multiple places - that high-protein/fat food is essential in preventing tantrums - and other negative toddler behaviors too, such as whining. Over at one of my all-time-favorite blogs, Like Mother Like Daughter, Auntie Leila shares in her awesome article on "Whining Whiners and How to Cure Them":
"The sorts of things that adults eat are often not suitable for children. You might be fine with your kale salad and your handful of nuts and your quinoa carrot stew, but a growing child needs fats and protein and nursery food -- and plenty of it...
"When you notice a marked rise in whining, put peanut butter and butter in the oatmeal, cheese in the eggs, extra butter on the toast, chips and fruit next to the sandwich, ham with the rice, cream in the soup, whole milk ricotta in the lasagna, whole milk in the glass, cookies with the milk, and ice cream for dessert. (You knew I'd say that!)
"Make sure the whiner gets a protein-rich snack between meals (but not right before a meal -- sit him down and feed him instead -- it hardly matters what, just so it's filling)."
And so, with all that in mind... I introduce to you my new diaper-bag essential!

Cute, no?
That's right! Portable peanut butter - chock-full of protein and fat. Add a spoon, and we're set (and maybe some raisins if I have them on hand). We may have to deal with tantrums, but I don't want protein-need tantrums and/or whining to be an issue for us while we're out and about.

It may not be the healthiest peanut butter, but... it's portable. And it comes in mini-packs! I'm a sucker for mini-packs when it comes to packing diaper-bags. So we'll deal with the peanut butter and eat the healthier type at home.

How do YOU prevent toddler tantrums? Let me know your strategies, please!